
If you sell epoxy floors, you have been asked some version of "what will it actually look like?" An epoxy floor visualizer answers that question before you mix a single batch. It takes a photo of your customer's own garage, basement, or shop and shows it with a flake blend, metallic, or solid color applied.
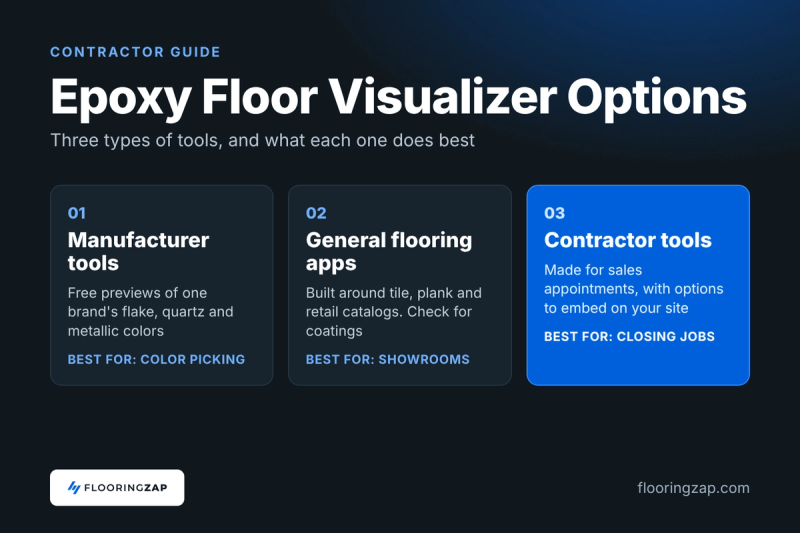
The tricky part is that "epoxy floor visualizer" covers three very different kinds of tools. Some are made by coating manufacturers, some are general flooring apps built around tile and plank, and some are built for contractors who sell and install floors. This guide breaks down what each type does well, where it falls short, and how to pick the right one for your business.
What an epoxy floor visualizer needs to do
Not every visualizer is built for coatings. Before you compare options, check for these basics:
- Works on your customer's real space. Stock rooms are fine for browsing, but a photo of the actual garage is what closes jobs.
- Shows epoxy finishes, not just tile and wood. Flake blends, metallics, quartz, and solid colors should be real options, not an afterthought.
- Fast enough for the appointment. If setup takes ten minutes, you will not use it in the driveway.
- Easy to share. The customer should be able to save the image or send it to a spouse who was not at the appointment.
- Captures leads when you are not there. This matters if you want a visualizer on your website and not only on your phone.
Newer tools use AI to place the new floor on a customer's photo, which is why you will also see people search for an "epoxy floor visualizer app" or "epoxy floor AI." The label matters less than whether the result looks believable enough to help someone say yes.
The three types of epoxy floor visualizers
1. Manufacturer visualizers
Coating manufacturers publish free visualizers to show off their own colors. Sherwin-Williams' HPF flooring visualizer is a good example. You can pick a preloaded room or upload a photo, then try the company's standard flake and quartz blends, solid colors, metallic epoxies, and custom blends.
Best for: contractors who already buy from that manufacturer and want a free tool for color selection.
Watch out for: you can only show what that manufacturer sells. If you use more than one system, the preview may not match what you install. The tool also lives on the manufacturer's website, so your brand is not the one the customer remembers.
2. General flooring and room-design apps
Most "best flooring visualizer" roundups cover tools built around tile, plank, and floor plans. One 2026 roundup of the top 10 flooring visualizer tools never mentions epoxy at all. Some of these products are strong for retailers. Floori, for example, is a website plugin aimed at retailers, installers, and remodelers, and Capterra lists its Basic plan at $165 per month with no free trial (listing last updated October 2026).
Best for: showrooms and retailers selling tile, plank, and carpet across many product lines.
Watch out for: coatings are a different product. Before you pay, ask for a demo on a garage photo with a flake or metallic option. If the tool cannot show the finishes you actually sell, it will not help you close epoxy jobs.
3. Contractor-focused visualizers
These are built for people who sell and install floors. FloorWIZ by Onfigr, for example, has been covered in the flooring trade press as a visualizer designed to drive sales for epoxy flooring brands.
FlooringZAP is in this group too, and since this is our blog, we will be upfront about that. A contractor uploads a photo of the customer's room and shows epoxy, hardwood, LVP, or tile in it. You can try it with free generations, and there is an embedded version that runs on your own website.
Best for: contractors who want to show options on a phone at the appointment and may want to collect leads on their own site.
Watch out for: every visualizer produces a preview, not a guarantee. Test any tool on a few photos from your own past jobs before you rely on it.
Quick comparison
- Manufacturer tools: free, limited to that company's products, hosted on their site.
- General flooring apps: often a monthly fee, broad catalogs, built mainly for retail.
- Contractor-focused tools: from free trials to monthly plans, built for sales appointments, some can be embedded on your site.
How to choose
- Test it on a real garage photo. Use a photo from a recent job, with a car and some clutter in the frame. See how cleanly it finds the floor.
- Check the finishes you sell. If you install metallics and flake, make sure those are in the tool, not just solid colors.
- Time yourself. From opening the app to showing a customer a result should take a couple of minutes.
- Look at what happens after. Can you save, download, or send the image with your quote?
- Decide where it lives. A tool on your phone helps at the appointment. A tool on your website can also bring in leads while you are on a job.
How to use a visualizer at the appointment
A visualizer works best as part of a simple routine:
- Take the photo on the first visit. Shoot wide and landscape, with as much floor showing as possible and as few objects as you can manage.
- Show three options, not ten. A good, better, and best choice keeps the decision easy and makes it natural to talk about higher-priced systems.
- Let the customer choose in the room. A decision made while they are looking at their own garage is stronger than one made later from a color chart.
- Send the image with your quote. The customer gets something to share, and your quote stays in front of them. If pricing is where deals stall, see our guide on how to price epoxy floors.
For more on turning previews into bigger tickets, read how to close higher-priced jobs with an epoxy floor visualizer.
Putting a visualizer on your own website
Most visitors to a flooring website are not ready to call. A visualizer gives them something to do: upload a photo, see their floor in a few finishes, and leave their contact information if they like what they see. That turns a casual visit into a lead who has already pictured the job. This is what the embedded FlooringZAP visualizer is built for. If you want to see it running on a site like yours, you can book a demo.
If you are still weighing your options, our roundup of the best software for epoxy contractors covers the other tools in your day-to-day work.
Epoxy floor visualizer FAQ
What is an epoxy floor visualizer?
An epoxy floor visualizer is a tool that shows how a coating, such as a flake blend, metallic, or solid color, will look in a specific space. Most let you upload a photo of the room and try different finishes on it.
Is there a free epoxy floor visualizer?
Yes. Several coating manufacturers offer free visualizers for their own products. Contractor-focused tools such as FlooringZAP also let you try a few free generations before you decide whether to pay.
Can I use a photo of my customer's actual garage?
Most tools allow it. Sherwin-Williams, for example, recommends landscape photos that show more floor and rooms without many objects. Cleaner photos usually give a cleaner result.
Do visualizers show metallic epoxy accurately?
They give you a useful preview, not a guarantee. Metallic and flake floors vary with the pour, the lighting, and the base color, so confirm the final look with a physical sample or a test area before you commit to a finish.
How much does an epoxy floor visualizer cost?
It depends on the type. Manufacturer tools are typically free. General flooring plugins can run into the hundreds of dollars per month, such as the $165 Basic plan Capterra lists for Floori. Contractor tools range from free trials to monthly plans, so check each tool's current pricing page.
See your next quote before you pitch it
The fastest way to judge a visualizer is to use it on a real job. Try FlooringZAP free with 2 free generations and upload a photo from your next estimate.